Showing posts with label handmade movement. Show all posts

Sunday, 11 November 2012

Handmade Monday: Kumihimo again and some wire work


Remember last week when I was struggling with my ends?! Well, thanks to you all reminding me not to give up, I did persevere and found the larger Kumihimo ends I needed in the bronze tone to finish the necklace properly. 

It's much tidier now, and I can think about starting my next braiding project.  There was almost a Sunday morning visit to A&E when I tried (thankfully unsuccessfully!) to glue the ends and the wire to my hand, but I'm sure with practise, it will all become much less hazardous.

I was lucky enough to go to the Hobbycrafts show at the NEC on Saturday and bought some lovely colour rattail, so watch this space for more braided necklaces and bracelet.

Here's a picture of the Kumihimo disc as requested, all set up with some pink and navy threads.

My only other make this week was a necklace and earrings set.  They are a bit of an experiment and the technique needs some refining (that means, the back side looks like a right dog's breakfast), but I thought I'd show them anyway.  I've nicknamed them the stained glass window set - they do look best in strong light where the gem colours look transparent.  Perhaps they need adapting into sun catchers or something like that - any ideas?


Here's the link to see what other crafty people have been doing this week

Alison x

Friday, 2 November 2012

Folksy Friday: Christmas swaps

I've had the pleasure of doing lots of swaps or trades on Folksy and Etsy recently, and got some beautiful handmade gifts in return.  I can't posts pictures of what I've received, as they are mostly Christmas gifts for friends and family who might just see this blog!  So I've picked some random but stunning creations from each of the shops I've traded with.  Thanks to everyone who has agreed to swap with me - it has to be the best way to shop.  Click on the picture or the shop link to visit.  Enjoy!

Art in Wax on Folksy


Hopeful Hare on Folksy

AdienCraftsandGifts on Etsy (it's just the bandana for sale, not the gorgeous Schnauzer!)


Fabulous shops, aren't they?

Alison x


Tuesday, 7 August 2012

Catching up

New on Folksy - heart charm necklace


This poor little blog has been neglected recently and I keep promising tutorials that don't materialise!  I must be more strict with myself.  I've missed handmade Monday for a couple of weeks too.

Wire woven leaf earrings


Mostly my excuse is restocking my Folksy shop, when I've now got a substantial number of items back for sale and have had a good number of sales.  Etsy is good too at the moment, with a recent big order for bag charms and my lovely wire work dragonfly has flown away to the US too.  Here are a few things I've put in since.  Weaving, charms and wire work continue to be themes.  I went a big paisley crazy with the earrings - they are quite big and bold.

Paisley earrings
Quartz swirl earrings
Vase bag charm
Next week I'll be a better blogger.  Already planning a tutorial, and hoping to show some more metal clay creations.  Honestly!

Monday, 16 January 2012

Handmade Monday: How to make a Danish love knot

So, Valentines Day is creeping up on us, but whether you like to celebrate that festival or not, you might find these Danish love knots attractive!  I saw a tutorial for making them a while ago, then lost it, and struggled to find it again so I thought I might do one of my own.  They are easy to make and I think pretty effective.

You will need:

Some wire - I used 20 gauge, 0.8mm antique bronze wire but you could experiment with different thicknesses
A mandrel or object to wind the wire round
Step 1
Cutting pliers
Cup burr (optional)
About 15 minutes

Step 1: Start to wind your wire around the mandrel or cylindrical object.  You can work off the spool for this project which means there is virtually no wastage.  Can you see what I've used here?  Actually, it's a chopstick!  At about 6mm diameter, I've found it the perfect size to use with this thickness of wire and the fact that it's wood makes it a bit easier to grip than something metal or plastic, especially early on when you need to be firm with the wire.


Step 2
Make enough winds so that the whole thing can be divided equally into three parts. I've used four full rounds for each of my three coils, so I needed to wind 12 times round the chop stick for each love knot.  If you use a different thickness of wire and/or diameter of mandrel, you may need more or fewer rounds in each coil - you'll need to experiment a bit to find out what is the best choice. 


Step 2: Slip the whole coil of wire off your mandrel.  Then snip the wire three times at the appropriate points to make three equally sized coils.Try to snip so that the two cut ends are at the same place on the coil - this makes it much easier to hide the cut ends neatly at the end of the work.  You can tidy the ends with a cup burr at this stage if you want to.

Step 3


Step 3: Take two of your coils and hook one onto the other at right angles as in the diagram.  You are going to start winding them together.  It's the same action as putting your keys onto a slider keyring, except it is easier and you won't necessarily break any finger nails!
Step 4


Step 4: When you've wound them both together, they'll look like this.


Step 5


Step 5: Now take your third coil and begin to wind it on to one of the joined coils in exactly the same way as Step 3.


Step 6


Step 6: When the three coils are all joined to together they look like this.


Step 7
Step 7: The only thing left to do is to join two of the coils in the middle of the third.  This is a tiny bit fiddly, but easier if you hold the coils as in the picture and start to wind them together just as you did to get the first two together.  Be careful not to allow the end of the coil to be unwinding itself at the same time as you are winding it forward.  It is really just like when you are putting that second key on the slider keyring and you have to keep checking that the first one is not slipping off as you do so.

If there isn't room to manoeuvre the coils like this then you may have used a thickness of wire or size of mandrel that is inappropriate for this project.  It's a bit like chain maille in that you don't know if it will work until you get a bit further on in the weave.


Step 8


Step 8: Here's this final wind about half way through.


Step 9


Step 9: Actually, you've finished and the knot should look a bit like this.  At this point you can gently ease out the coils a bit, which will make the knot a little firmer.  Try to tuck the ends inside the knot so they can't be seen too. 


Step 10


Step 10: The finished knot can be mounted on a wire or threaded directly on beading thread.  Heck, it's your bead so you can do whatever you want with it now. There's a right way to put the wire or thread in the bead so that it sits properly - it's too complicated to explain in words, but you'll see what I mean as you try it out. 


I like them on wire with a bead cap or spacer on each end to cover the hole and give stability.


These ones in antique bronze wire are probably destined to become a bracelet.


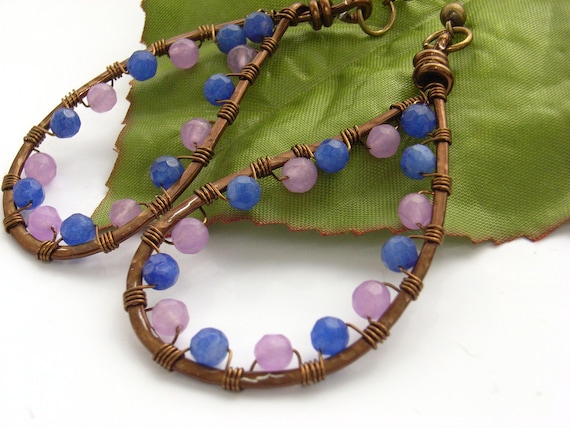
I love these bronze earrings with red creek jasper beads too.

Look on the web and you'll see some stunning examples of folk making these in semi precious wires and then threading one on a chain as a stunning, understated necklace.

Why are they 'Danish' love knots?  I've no idea.  Some folk just call them love knots.  But I like the idea of them being Danish - it's so trendy at the moment with The Killing and Borgen providing our Saturday night entertainment!  You can't make them at the same time as watching, though, unless your Danish is so good that you don't really need the subtitles. 

Hope you've enjoyed the tutorial.  Here's a link to what my other handmade friends have been up to this week.


Monday, 15 August 2011

Handmade Monday

Decided to have a go at a Handmade Monday post, having read about it on CraftBlogUK - another great tip from the amazing Haptree, thank you!  It will be lovely to see and talk about what other folk are making.

This week I haven't had much time to focus on my current obsession with wire work and antique bronze pieces, but I have been thinking about the end of summer and how to make sure there's plenty of late summer items available in my shops. 

In spring I bought a strand of brightly coloured shells but haven't known what to do with them.  Then I thought they might contrast nicely with the dark wire and I could do some very simple wrapping.  Sitting down one evening, I was going to really make myself go completely random with the pattern but alas, my controlling self got in the way, and as you'll see there are rigid patterns of seven colours in each section!  So wish I could do something random or asymmetrical - perhaps this could be my crafter's challenge?  Anyone else want to join me on that one?!

The finished necklace - bright and dark together
Here's the link back to Handmade Monday:
http://www.1stuniquegifts.co.uk/blog/2011/08/handmade-monday-29/

Thursday, 4 August 2011

Celebrating two years of online selling

I am three today!
OK, so if it is the dog's birthday, that means it is also an anniversary for my Etsy shop, the first one I opened online, and means that I've now been selling online for a full two years.  I don't claim to have any special insight, but I must admit that hanging out in the Etsy, Folksy and Dreamaid forums, I've seen so many people start off with great enthusiasm and then realise how hard getting noticed is and fade away, that I do feel like a bit of a veteran!

It all has been much more complicated than I thought when I started out - I had that basic "I'll put it online, people will see it and buy it, job done" sort of idea.  I had never really thought about the competition for SEO, the complexities of pricing, how much time social networking would take etc.  Then there are the off-line tasks - photos, listings, business cards, packaging.  It really is a full time job, on top of a full time job.

This week's earrings
My advice to anyone starting out would be don't start unless you are really happy to spend more time on the business of selling than you are on making things.  This works out OK for me, as most of my jewellery is quick to make, and if I spent as much time on that as promoting, this tiny little house would be bursting at the seams.

I enjoy the selling, but the making is still the best part for me. I've moved on in terms of crafting skills as well, and I hope this shows in my work.  There is so much more material available now in terms of interesting and colourful gemstone and findings - as many of you know, I'm as much addicted to buying beads as making things!

And another pair of earrings!
I have five online shops (Folksy, Etsy, Dreamaid, Zibbet and Stylistic Gallery), but my main focus is Folksy, as it gives the best value for money in terms of SEO and that's really what gets online non-crafty customers to your shop.  I've nothing against crafters of course, but I want to reach the real magpies in the population who adore gemstone jewellery but don't want the hassle of making it themselves.  I've been very lucky with around 117 online sales across the shops in the 2 years, and only about 5 of those sales have been to other crafters or handmade shop owners.  Thanks to all my customers, as well as those folks who have given great advice over the two years - I literally couldn't have done it without you.

Other sales in the 'real' world have boosted my total to around 150, thanks mainly to colleagues in the day job, and it's great that they and some online customers are now regulars.  I don't sell to friends and family so if they admire something, I tend to end up giving it away (one of the many reasons why I'll never be a millionaire!) but I have inflicted a number of items on them as birthday and Christmas presents - poor things!

Enough rambling.  In the spirit of onwards and upwards, I'm celebrating this anniversary by launching my own website www.blueforestjewellery.com  Two years ago I could never have dreamed I'd be able to do this, so allow me a proud moment, please!  It is in it's early stages, though, and I'm still on a steep learning curve, so please pop along if you have time and do please send any comments you have.

Wednesday, 13 July 2011

Photography tips from a non-professional: Making your product photos stand out

This blog post on photography was so popular, I thought I'd dare to venture down that road again and show you my tips for post production, or making your product photos really pop after you've taken them.

I use Gimp but I'm sure the instructions are pretty much the same for other photo manipulation software.  Gimp is my choice because it's free and there are bits of it I can understand.  If only I had more time to work with it, I'm sure I could do some pretty cool things.  But I'm a confirmed amateur, and I'm deliberately avoiding any technical language here because I just don't understand it. 

Anyway, here goes!  Hope it's helpful.


Open your photo in Gimp - you perhaps want to make a copy to work on.  Here's some tigers eye and carnelian earrrings looking a little grey and flat.  What I'm showing you here is how to get a white background and make the image stand out but without distorting the colours or contrast of the product.

 Choose the 'colours' menu, and from that 'levels'

You get a graph - don't panic!  You are going to manipulate the graph, but it won't be like maths in school, honestly :-)

 Locate the little triangles underneath the graph at either end...

 ... and simply grab them and drag them to where the black shape on your graph starts.  I've started with the right hand one and pulled it over to meet the end of the black blob graph shape.  Note how this has already lighted the background from grey to off white. ('grab' and 'blob' are technical terms, honest!)

You can experiment with moving the triangles further, but you'll see once you are in the zone of the black shape of the graph, you'll start to distort the colour and contrast.  Keep the triangles right at the start of where the graphs start at either side, and you'll generally get the clearest image.

 You can save now, or alternatively, you can pick up the 'dropper' icon on the right....

 ...and pop it anywhere on your background.  With a bit of luck, it will give you a snow white background too!  Combine the two approaches and your product should really start to stand out.

 You've done it!  Any problems, you can always use 'reset'.  Don't forget to save before you quit. 

Phew!  My first tutorial with screen shots.  Let me know if it's useful, and if I've made any mistakes. 

Alison

Tuesday, 5 July 2011

A blog about not blogging

Coming soon to a Folksy shop near you...
Just a quick blog to apologise about the lack of blogging!  I know, I might as well have prepared a proper post in the time it will take me to type this, but hey, I never said I was logical!!

Amazonite reminds me of the sea.. 


Just to prove that I'm not spending these long summer evenings doing absolutely nothing, I'll let you into the secret that I'm preparing the all-singing, all-dancing Blue Forest Jewellery website.  I've set myself a target of having it ready for the 4th August, the two year anniversary of starting to sell online, and incidentally, the dog's birthday.  Progress is slow, however, as every time I enter a new element, I then have to change my mind about 60 times about the look of it.  Good job no-one is paying me to do web design.

Sunshine in a bead!


Yesterday I had a parcel from the lovely Cathy of Headpinwear on Etsy - part of a little bead swap we arranged.  She was very generous and there are lots of things there that are just a little bit different from what I would normally use, so expect something a little bit different.

Suitable for the Queen of Sheba


And there is the new range of jewellery in antique bronze.  It was a mistake to get started on that - now I'm using the excuse that I need to see all my designs made in silver and bronze to buy more beads and findings.  Cunning, eh?

 And before I go, I must confess to smelling nice now (too much information?!) thanks to my friend Chrissy's lovely birthday gift of bubbles and body lotion. And of course, a beautiful card too!  So lucky to have such good friends.


Related Posts with Thumbnails